In Windows 10, you typically only need to tap a few keys on their keyboard to know about how to take a screenshot on windows. The primary drawback of Windows 10’s built-in snapshot tools is that users can’t annotate the screenshots they take with them. Some functionalities require an image editing programme to function.
On a PC, it’s typical to wish to take a screenshot. One can complete it manually if a third-party programme is not being used. The easiest method is to just press the PrtSc or Print Screen keys on the keyboard, which will capture the full PC screen. When using Windows OS, users may accomplish this by pressing the Print Screen key, which is on the top right of the keyboard, to capture the entire screen and copy it to the clipboard or save it to the screenshots folder.
However, there are other ways that must be known about how to take a screenshot on windows.
4 Methods on How To Take A Screenshot on Windows?
Given below are the alternatives other than the snipping tools on how to take a screenshot on windows:
- Utilising the Print Screen key: First method on how to take a screenshot on windows.
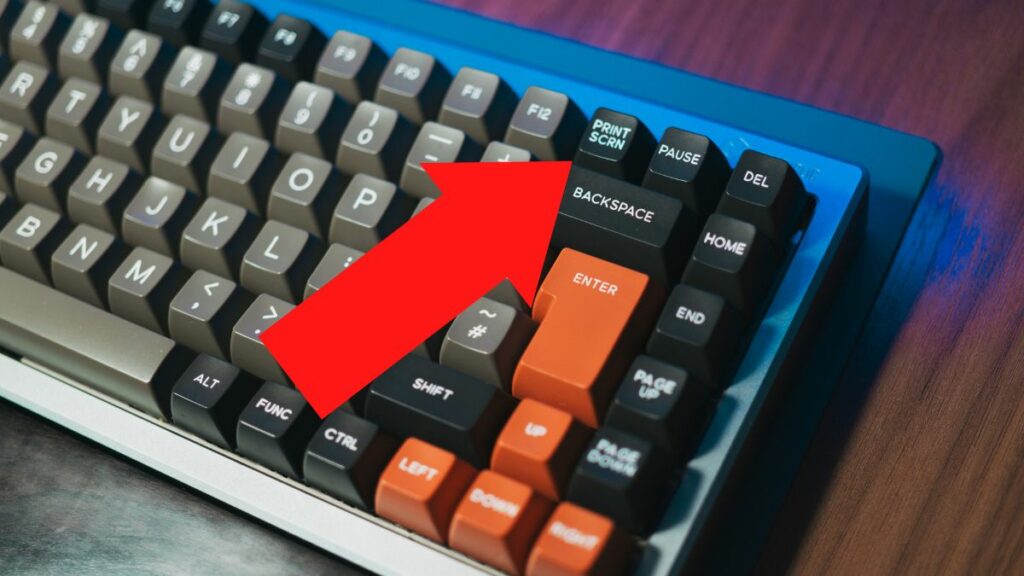
- Right now, if one looks at the computer keyboard, they should notice a key labelled “Print Screen.” This key frequently rests immediately next to the F12 key. In Windows 10, you can use this key to take screenshots as the name would imply, however one should couple it with an image editing programme. Users can use Paint, a straightforward image editor included with Windows.
- Simply press this key to begin taking a screenshot, which will turn the currently open window into a passable image. To save the image as a PNG or JPG file, paste it into Paint (or your preferred image editing programme) which would provide the solution for how to take a screenshot on windows.
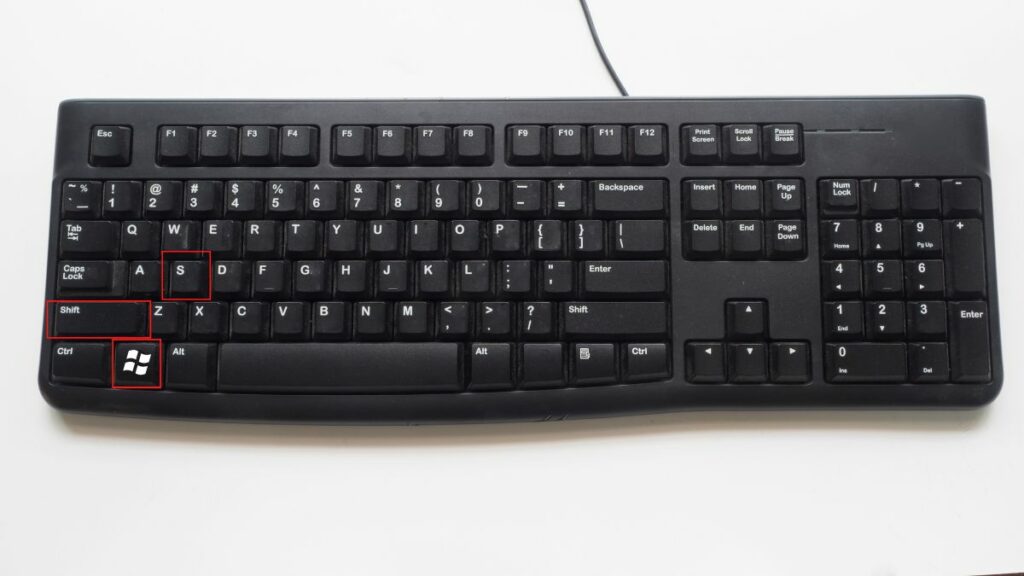
- Using Windows+Shift+S keys: Second method on how to take a screenshot on windows.
- Because they take full-screen screenshots, the two methods mentioned above about how to take a screenshot on windows have a significant drawback of preventing users from selecting a specific area of the screen. This method can be used to capture a specific portion of the screen.
- When the question is of how to take a screenshot on windows, this is one of the most effective methods used by many users.
- Press Windows + Shift + S when the computer is open on the screen you want to take a screenshot of. A white overlay placed over the computer screen can be seen.
- At the top of the computer screen, one should then select a snipping mode. There are four snipping options available with this Windows 10 application.
- After selecting the capture mode, the user can then drag your mouse to select the preferred area to copy to the clipboard.
- The user should know they are in capture mode and should get ready to take screenshots when their mouse turns into a plus sign (+).
- This ends the process for how to take a screenshot on windows using Windows+Shift+S keys.
Also Learn How to Convert PDF to Word
- Using Xbox Game Bar: Third method for how to take a screenshot on windows:

- If you play PC games, you’ll adore the Game DVR function for using the Xbox app to share your best gaming moments with others. Even if you don’t enjoy playing video games, you can utilise the Game DVR application to capture significant moments while using your computer.
- The Xbox app should be opened as the user’s initial step before knowing how to take a screenshot on windows.
- Make sure “Record game clips and screenshots using Game DVR” is enabled by going to Settings > Game DVR. Additionally, make sure the keyboard shortcut for taking a shot is configured. By default, it should be Windows Key + Alt + PrtScn, but one can change it to whatever works best for them.
- In the Saving captures section, continue scrolling down to the folder where the screen captures are saved. By default, the photographs are saved as PNG files and kept on the C: drive in the Videos directory of the Captures folder.
- When everything is set up, it’s time to take a screenshot. Hit Windows Key + G to open the Game Bar when in an application and click or press the “Yes, this is a game” box.
- Then, to snap a picture, click or tap the camera icon. Please take note that the keyboard shortcut will only function if the “Yes, this is a game” box has already been ticked.
- The user will receive a notification in the Action Centre each time they take a new picture before completing the procedure for how to take a screenshot on windows.
- The Xbox app will open to the shot when the user chooses the notice from the Action Center, allowing them to view it. Additionally, they can view earlier photographs or videos they have taken. The application name, time, and date that the screenshot was taken are all included in the snapshot file (down to the second). For instance, If a user captured Microsoft Edge in the picture below at 12:36 a.m. on June 7. But they can easily rename the shot inside the Xbox app.
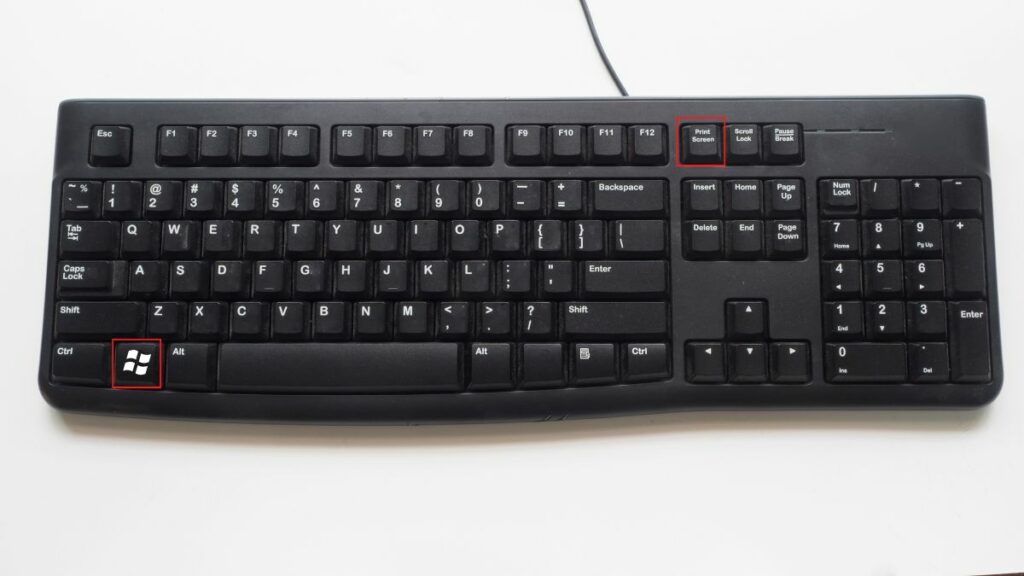
- Using Windows+Print Screen keys: Fourth method on how to take a screenshot on windows.
- The above technique necessitates pasting the image into an image editing programme before saving it as a PNG or JPG file.
- Users can choose to use this second approach if they are sufficiently lazy to do so. Windows 10 will begin capturing the screen when they simply press the Windows+Print Screen buttons.
- The screenshot will be kept on their account in the Screenshots folder under the Pictures folder.
There are various undiscovered screenshotting tools in Windows. Users can learn about how to take a screenshot on windows in multiple different ways without downloading any additional software. If they frequently take screenshots of their laptop screen on a daily basis, this is wonderful news for them because it eliminates the need to install a third-party tool.